
The Pattern

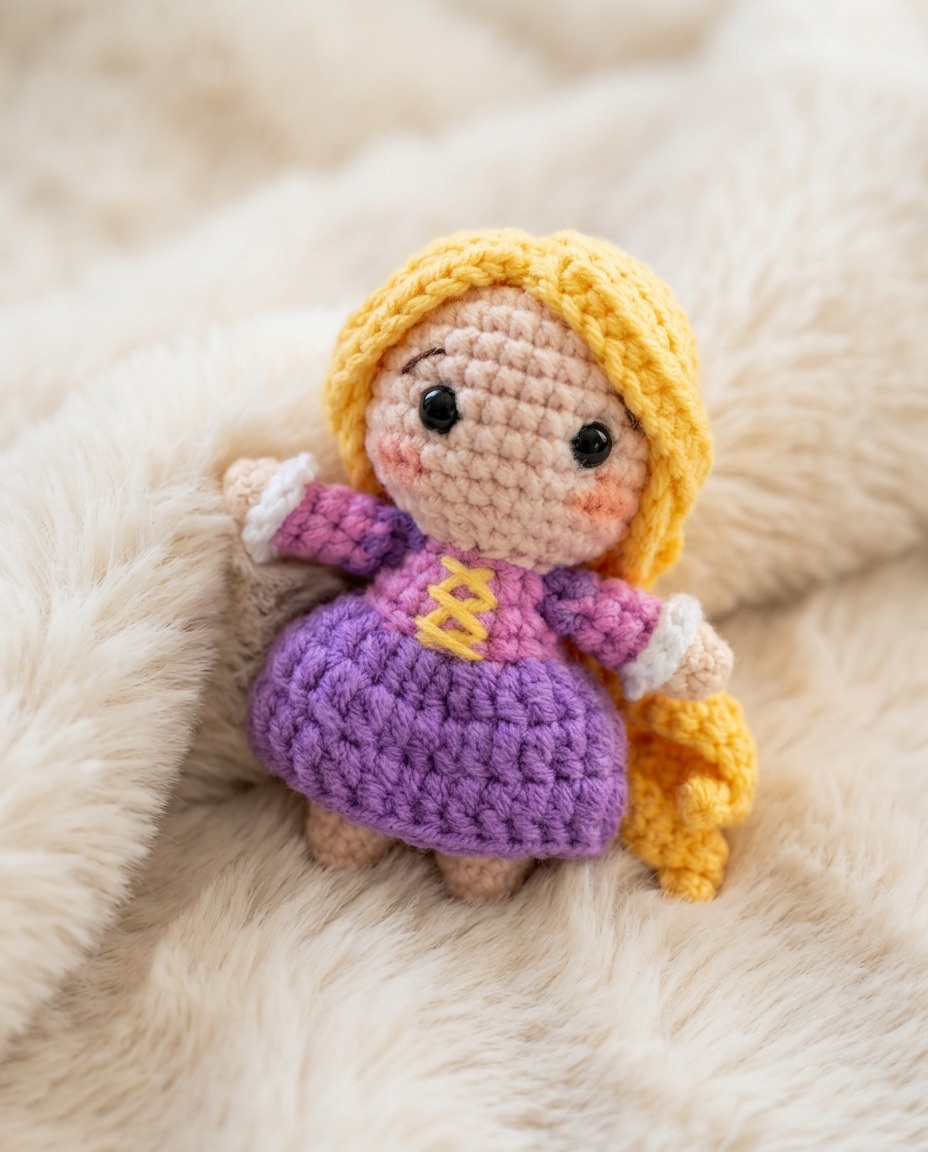
Mini crochet Rapunzel amigurumi doll with a long braided blonde plait, a pink and purple dress with a yellow laced bodice, and white cuffs
Mini Dolly

A Pocket-Sized Princess With a Laced Bodice

Mini Dolly built this one for absolute beginners, and it shows in the best way. The doll is tiny enough to sit in your palm, so every piece works up fast and nothing feels like a commitment. The golden plait is the showpiece, worked long and left to trail down past the skirt.

The dress carries the detail, with a soft pink bodice, a fuller purple skirt, white cuffs at the wrists, and a yellow laced corset stitched right onto the front. This one is made in separate pieces and joined at the end, and the tutorial runs across two parts, so give yourself enough time to work through both before the doll comes together.

Ready to start?

This free pattern is by Mini Dolly, taught as a step by step tutorial on their channel. Part one covers the doll and part two covers joining everything together.

Get the Free Pattern →

What You'll Need

The tutorial demonstrates the materials on screen rather than listing them out, so treat this as the shopping categories and match the specifics to whatever you already have in your stash.

  • Yarn Five colors of scrap yarn. Skin tone for the head and limbs, golden yellow for the hair, pink and purple for the dress, and white for the cuffs. A mini doll like this one barely makes a dent in a skein, so odds and ends are perfect.
  • Hook A size below what your yarn label suggests. Amigurumi is worked tighter than usual so the stuffing cannot peek through the stitches. Match the hook to the yarn you picked, then go down one size.
  • Stuffing Polyester fiberfill. You need very little at this size. Small pinches added gradually give a much smoother shape than one big handful.
  • Safety eyes Small black safety eyes. Scale them to your doll, since oversized eyes overwhelm a face this small. Embroidered eyes are the safer choice if the doll is headed to a baby or toddler.
  • Extras Yarn needle, stitch markers, and blush. The needle handles both the joining and the laced bodice detail. A dab of powder blush on the cheeks gives the finished look in the photo.

Tips Before You Start

A few things worth knowing that the pattern page does not always spell out.

1

Queue up both parts before you start

The tutorial is split across two videos. Part one gets you the pieces and part two covers joining them into a finished doll, so it helps to know the second half is waiting rather than discovering it when you reach the end of the first.

2

Pin the pieces before you sew anything

This doll is assembled rather than worked in one piece, and placement is what gives it personality. Pin the arms, legs, and hair in place first and look at the doll straight on. A head tilted slightly or arms set a few stitches too high changes the whole expression.

3

Place the eyes low and close together

On a doll this small, a couple of stitches makes a dramatic difference. Setting the eyes low on the face and fairly close together reads as sweet and childlike, while eyes set high and wide look startled. Test the position before you lock the backs on.

4

Save the laced bodice for last

That yellow criss cross on the front of the dress is surface embroidery worked over finished fabric, not part of the crochet. Stitch it once the bodice is assembled and stuffed, so you can see the shape you are decorating and keep the lacing even.

5

Give the plait its own weight check

The long braid is the signature of this doll, but a heavy plait can pull a small head off balance or tip the whole doll backward. Braid it loosely, and if it feels too weighty, tack it to the back of the dress with a few discreet stitches.