The Pattern

Crochet amigurumi cat with tan and cream stripes, a soft cream belly patch, safety eyes, and embroidered whiskers
Free Pattern by Anitha Domacin

Striped Cat Amigurumi

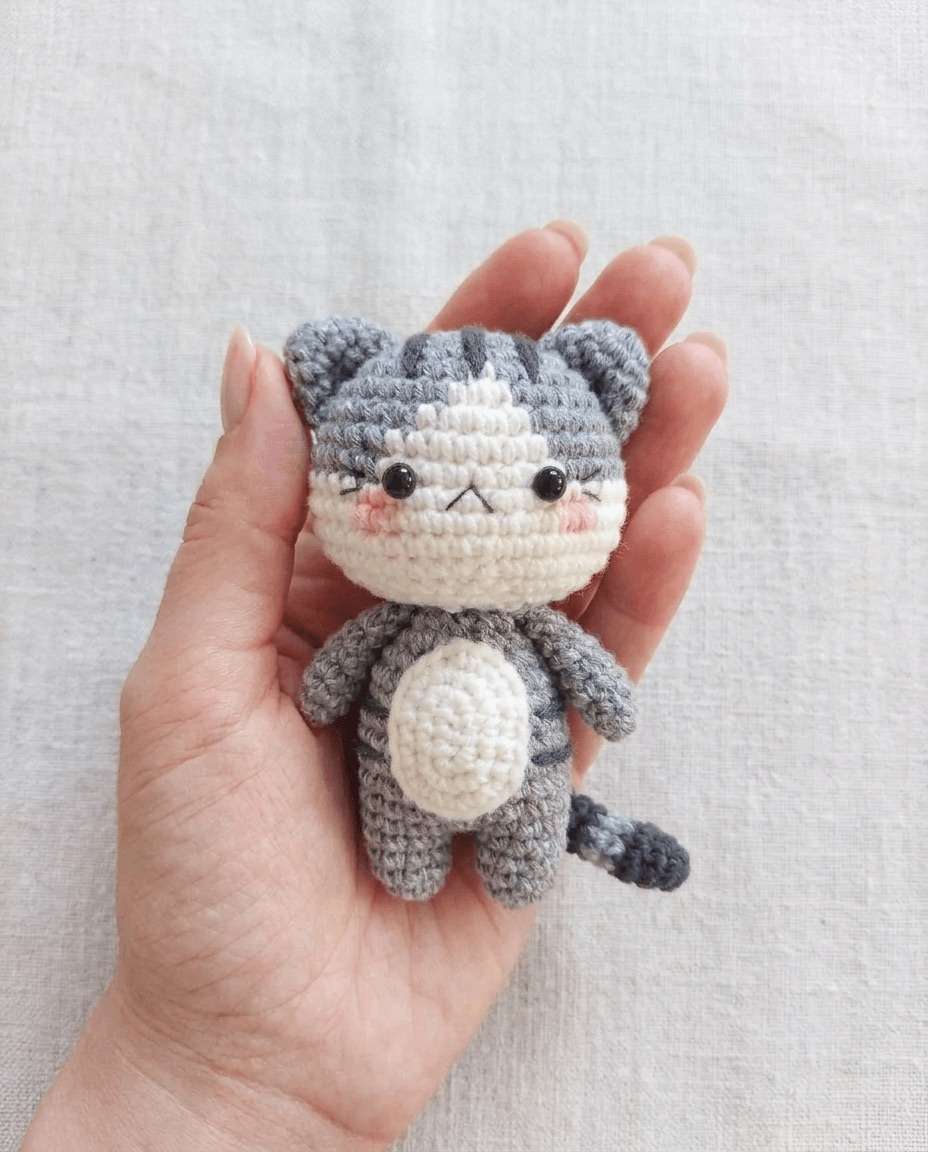
This free pattern from Anitha Domacin at A Little Love Everyday is the kind of amigurumi that wins over even self proclaimed dog people. The cat is worked in soft milk cotton with gentle stripes across the head and body, a cream belly patch, and a little embroidered face with an inverted v mouth and whiskers. Those small finishing touches are what give it so much personality.

It is made from separate pieces, the head, body, two ears, two arms, two legs, and a tail, that you stuff and sew together at the end. It uses a 3mm hook with 5ply milk cotton, so the stitches stay tight and the stuffing never peeks through. Most makers finish it across an evening or two once you factor in the stitching and assembly.

Ready to start?

This free pattern is by Anitha Domacin at A Little Love Everyday. The full written instructions, stitch counts, and photos are all on her site.

Get the Free Pattern →

What You'll Need

A short supply list, with stripes that let you use up cotton scraps.

  • Yarn 5ply milk cotton in tan, cream, and brown. The cotton gives the cat a smooth, matte finish and crisp stitch definition. Three colors are all you need for the stripes and belly patch.
  • Hook 3mm crochet hook. A touch smaller than the yarn suggests, which keeps the fabric dense so the fiberfill stays hidden inside.
  • Safety eyes 8mm safety eyes. Or embroider the eyes with black thread instead, which is the safer choice if this is going to a baby or toddler.
  • Stuffing Polyester fiberfill. You will not need much. Add it in small amounts and stuff as you go for the cleanest shaping.
  • Extras Tapestry needle plus black embroidery thread and needle. For sewing the pieces together and stitching the nose, mouth, and whiskers.

Tips Before You Start

A few things worth knowing that the pattern page does not always spell out.

1

Mark the start of every round

The pieces are worked in continuous rounds with no joins, so it is easy to lose your place. Drop a stitch marker into the first stitch of each round and move it up as you go. It saves a lot of recounting on the head and body.

2

Plan your stripe color changes

Switch colors on the last yarn over of the final stitch before the new color, so the next round starts clean. For narrow stripes you can carry the unused color up the inside; for wider gaps, cut and weave in to avoid loose strands showing through the cotton.

3

Place the safety eyes before you close the head

Attach the 8mm eyes while there is still an opening to reach inside and snap the backs on. Once the head is stuffed and sewn shut you cannot add them. Hold them in place first to check the spacing before you commit.

4

Pin everything before you sew

Because this cat is assembled from separate pieces, where you place the ears, arms, legs, and belly patch decides its whole expression. Pin them on first, step back, and adjust until it looks balanced before you start sewing anything down.

5

Save the face details for last

Embroider the inverted v mouth and whiskers after the head is stuffed and attached. Working on the finished shape lets you see the curve of the face, so you can keep the mouth centered and the whiskers even. Use long tails you can bury inside the head to hide the knots.